Video
Kite can show a live video feed alongside (or behind) the map — a local capture device such as a webcam or USB capture card, or an RTSP stream from a network video source. Open it from the Video tool on the navigation rail.
Choosing a source
Pick the source kind from the dropdown, set it up, then Start / Stop the feed. Your choice is remembered between sessions.
- Camera (device) — a local capture device opened the simple way, through the system's built-in camera access. Choose a device from the dropdown (webcams and capture cards the system exposes are listed automatically). No extra downloads.
- Native Capture (Advanced) — a local capture device opened via Kite's capture engine for more control and wider device support. See the comparison below.
- RTSP (network) — enter the stream URL (e.g. from your video receiver or an RTSP server), pick a transport, and optionally save the connection to a list for one-click recall — see RTSP connections below.
Supported RTSP video codecs: H.264 and MJPEG
Those two are what Kite officially supports and tests over RTSP today. H.264 is the usual choice and works everywhere. MJPEG costs more bandwidth but is passed through untouched — on Linux that makes it the lightest option by a wide margin (see the platform notes).
Other codecs — HEVC/H.265, VP8, VP9, AV1 — are not supported. Some may happen to work on some systems, but none is tested, and a stream Kite cannot play usually shows up as an endless "Reconnecting…" rather than a clear error. If you need one of them, please open a request: the limit is that we have no way to test it, not that it is impossible.
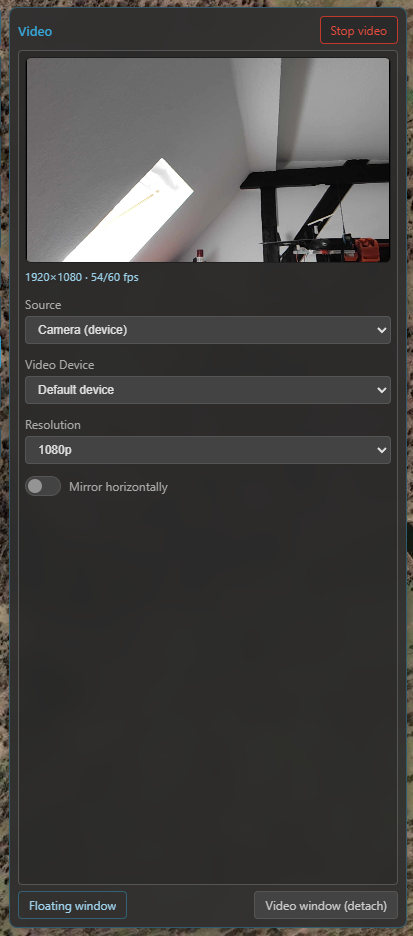
The Video panel — source kind, device / RTSP URL, resolution, frame rate and mirror, with Start/Stop.
Camera (device) vs Native Capture — which should I use?
Both play a local capture device; they differ in how they open it.
| Camera (device) | Native Capture (Advanced) | |
|---|---|---|
| Setup | Nothing to install | Needs the ffmpeg helper (downloaded automatically) |
| Device list | What the system exposes to apps | Read directly from the capture hardware — can find devices the Camera list doesn't show (e.g. some USB HDMI capture dongles) |
| Resolution / frame rate | A request — Auto / 720p / 1080p and an optional 30 / 60 fps wish; the camera picks the closest mode it supports | Device-verified — only the resolutions and frame rates your device actually reports (from a curated FPV set: SD PAL/NTSC, 480p, 720p, 1080p, 1440p) |
| Codec | Chosen automatically | Chosen automatically to hit the selected resolution/frame rate |
Start with Camera (device). Switch to Native Capture (Advanced) if your device isn't listed under Camera, or when you want to pin an exact resolution / frame rate that the device confirms it supports. Both deliver the same smooth, hardware-accelerated picture for devices the system can open; Native additionally reaches devices that only the capture engine can see.
Resolution, frame rate and mirror
- Resolution — Camera offers Auto / 480p / 720p / 1080p; Native offers the device-verified list.
- Format (Native only) — the capture format the device reports, e.g. MJPEG or a raw one. MJPEG is the efficient choice: the picture is passed straight through with no conversion at all.
- Frame rate — Camera offers Auto / 30 / 60 fps; Native offers the frame rates the device reports for the chosen resolution and format.
- Mirror — flip the image horizontally (handy for front-facing cameras). Applies to every place the feed is shown.
- Disable hardware acceleration — force the CPU for any stream conversion. Only needed if the picture is broken or unstable with hardware acceleration; the setting is remembered.
While a feed is live the panel names the pipeline underneath the picture, with two labels:
Transcode (Copy = nothing is converted · Hardware · Software) and Surface (how the
picture reaches the screen). Copy is the cheapest possible case.
RTSP connections, transport and auto-reconnect
The RTSP source has a small connection manager built in:
- Direct connect — type the
rtsp://…URL and press Start. Next to the URL sits the transport selector:- Auto (default) — tries the engine's native reader first, then the ffmpeg fallback. Right for most sources.
- UDP — lowest latency; required for UDP-only servers (some FPV / air-unit streamers). Uses the ffmpeg helper.
- TCP — for sources that only speak interleaved TCP, or when UDP is blocked by the network.
- Save it — the 💾 button stores the current URL + transport as a named entry (named after the host; rename it via ✎). Connections are only saved when you press the button — never automatically.
- The list — each saved connection is a one-line entry: click it to load and connect, ✎ edits name / URL / transport inline, ✕ removes it. The entry matching the current URL is highlighted.
Auto-reconnect: if a running RTSP feed drops or stalls — a radio hole on a cellular link, the source restarting, a network change — Kite reconnects automatically and keeps trying indefinitely until the feed returns or you stop it. While it retries, every video surface shows a "Reconnecting… (n)" overlay with the attempt count and a Stop button. Brief dropouts on a live feed are given a few seconds to heal on their own before a full reconnect is forced, so momentary signal dips don't interrupt the stream unnecessarily.
Helpers download themselves
Camera (device) needs nothing extra. Native Capture uses the bundled ffmpeg engine. RTSP uses go2rtc for the direct video path and ffmpeg for the image path — a machine whose browser engine offers no direct path (common on Linux) uses ffmpeg alone and never needs go2rtc. Kite downloads whichever it needs automatically the first time you use that source — no manual install. On macOS these are shipped with the app.
Where the video shows
The same feed can appear in several places at once (they all share one stream):
- In the panel — a preview right in the Video panel.
- As a widget — the Video widget in a dock, sized to the stream's aspect ratio.
- In a floating window — a movable video frame over the map. Drag the video body to move it; dragging it to the bottom-left corner snaps it there, where it displaces the bottom widget dock to make room (the dock shrinks by the window's size). Drag it away from the corner to un-snap and free-float. The top-right corner grip resizes it (aspect-locked, touch-friendly).
- In a detached window (Windows only — see the platform notes; the button is simply absent elsewhere) — a separate, free-floating OS window you can place anywhere, including outside the app or on a second monitor. Opened from the Video panel; because it lives outside the app it's closed from the OS (not from inside Kite), and — unlike the floating window — it can't host the map (no swap). It's also the lightest option: the OS draws it directly, so on low-power systems using only the detached window keeps GPU load to a minimum.
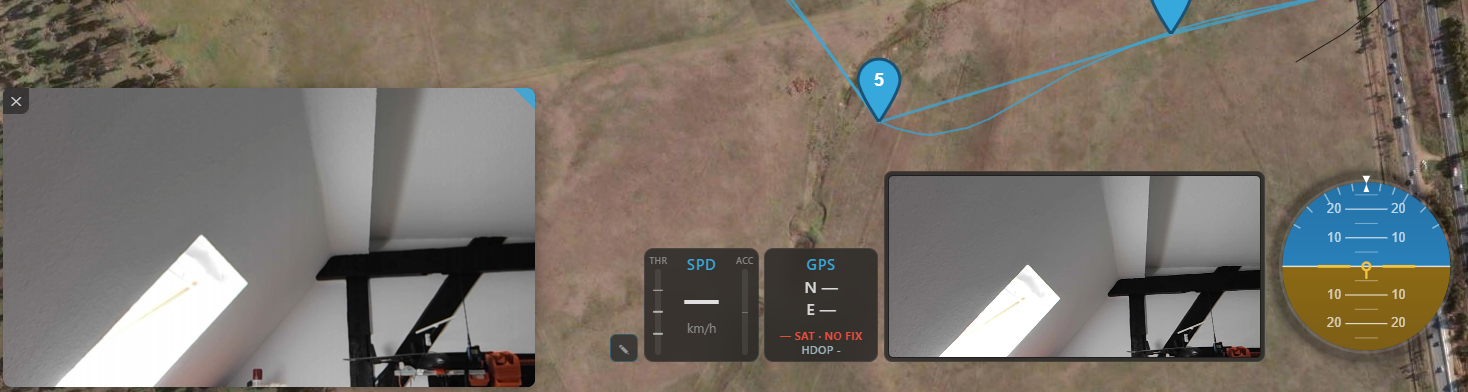
The floating video window (over the map) and the dockable Video widget — both showing the same feed.
Map ↔ video swap
Double-click a video surface (the Video widget or the floating window) to swap it with the map: the map jumps into the surface you clicked and the video moves out to the full-screen background — so you get video as your main view with the map in the small frame. Double-click again to send the map back to the full-screen background.
How interactive the swapped-in mini-map is depends on where it landed:
- In the widget — deliberately limited by space: 2D only and heading-follow only, but you can zoom.
- In the floating window — fully interactive: pan and zoom normally (left-drag / single-touch). To move the floating frame itself while it holds the map, drag with the right mouse button (desktop) or two fingers (touchscreen).
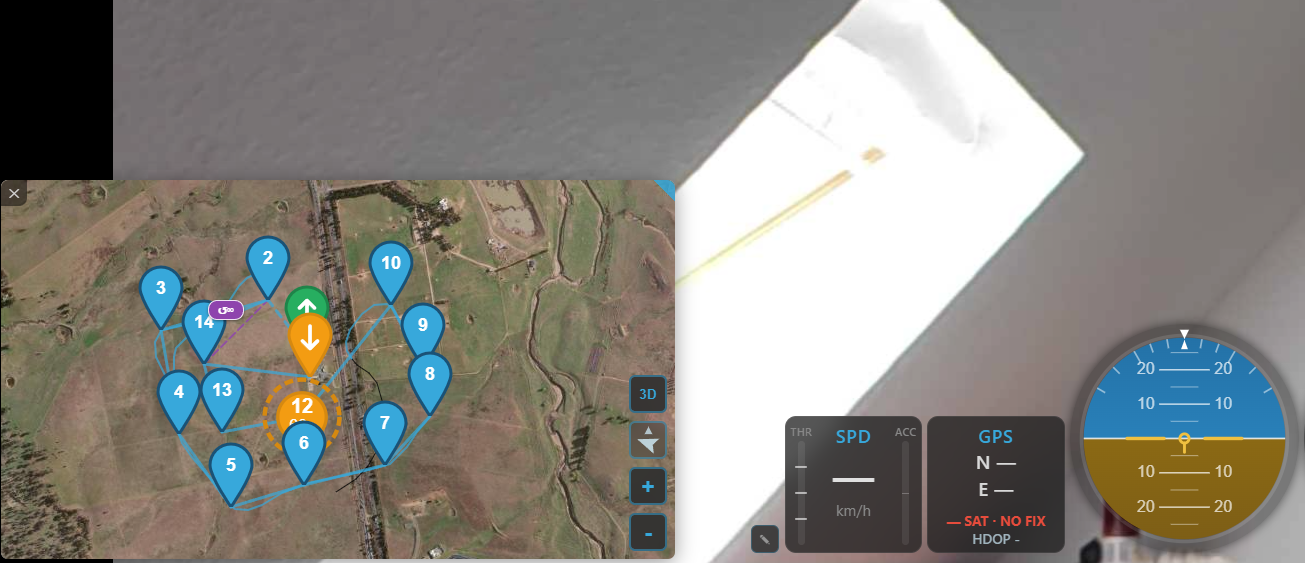
Swapped: the live video fills the background while the map rides in the smaller frame.
Platform notes: what to expect per operating system
Video is the one part of Kite that depends heavily on components Kite does not ship: the operating system's built-in browser engine and its media plugins. That works out very differently per platform, and it is only fair to say so plainly.
Windows and macOS are the more predictable hosts for video. Both ship a single, consistent media stack, so a network stream is played directly by the system's hardware-accelerated decoder. If a smooth, low-CPU, low-latency feed is important to you — and especially if you plan to fly with it — those are the platforms we can most confidently recommend.
On Linux, video support is provided as-is. Kite runs in WebKitGTK there, which hands video playback to GStreamer — and which plugins your distribution installs is entirely up to your distribution. There are hundreds of combinations of distro, desktop, graphics driver and plugin set, and we cannot test or support them all. Concretely, these are things Kite cannot fix from its side:
- Whether an RTSP stream can be played directly at all. Many Linux systems — Raspberry Pi OS and current Debian desktops among them — run a browser engine that does not expose the direct (WebRTC) video path, and that cannot be installed after the fact. Kite then falls back to a converted image stream. It works, but it adds a conversion, so expect noticeably more latency than on Windows or macOS — this is the single biggest practical difference. If a smaller delay matters more than resolution, send a smaller or slower stream from the source (e.g. 480p instead of 720p, or 30 instead of 60 fps): that saves work at every stage at once.
- How much each frame costs to put on screen. The image path decodes every frame for display, and the Linux engine is markedly slower at that than the Windows one — measured on one laptop, the same 720×576 frame took about 13 ms against roughly 2 ms, and longer while the machine was busy. So a frame rate that is effortless on Windows can be out of reach on comparable Linux hardware, whatever the CPU says.
- Whether that conversion uses your graphics hardware. Kite tests your machine at start-up and uses the GPU for the conversion when it can — on Intel and AMD desktop graphics via VAAPI, and on Raspberry Pi 3/4 class boards via their built-in decoder. Where that works it is a large saving (measured on an Intel laptop: roughly a seventh of the CPU load). But it depends entirely on your driver stack: NVIDIA cards are not specifically covered, and any machine whose test fails simply converts on the CPU instead. The Video panel names the path in use, and the diagnostic log records the verdict (see Video troubleshooting).
- A camera that already delivers MJPEG is the best case on Linux. Nothing is converted at all — the picture is passed through unchanged, which costs almost nothing and gives the lowest delay Linux can offer. If latency is your priority on Linux, prefer an MJPEG source. The Video panel shows Transcode: Copy when this applies.
- You can force the CPU path. If hardware conversion misbehaves on your machine, switch on Disable hardware acceleration in the Video panel; the setting is remembered.
- Local camera quirks. On Linux the system camera layer can be slow or unresponsive on some setups. Kite works around the worst cases (it caps the automatic resolution and frame rate, and routes the advanced capture path around that layer entirely), but a camera the system itself can't open cleanly is out of reach.
- Picture-in-Picture (the detached "Video Window") is a Windows-only feature — neither the Linux nor the macOS browser engine offers the interface Kite would need for it. All the in-app surfaces (panel, widget, floating window, full-screen swap) work everywhere.
None of this means Linux is unusable — a well-equipped desktop distribution generally plays video fine, and it is a first-class platform for everything else Kite does. It only means that if video is your priority, Linux is the platform where you may have to do some work yourself, and we can't promise a particular result on a particular machine. In short: Windows and macOS for maximum compatibility and the lowest delay; on Linux, an MJPEG source is the setup that gets closest.
Where to go next
- Put the Video widget in a dock: Telemetry & display.
- Trouble getting a stream? Video troubleshooting.